Virtual Classroom Setup: Step-by-Step Guide on How to Create a Virtual Classroom
Virtual Classroom Setup: Step-by-Step Guide on How to Create a Virtual Classroom
February 23, 2024
6 min read
Table of contents
The landscape of education is evolving, and universities are embracing the power of online learning. But creating a virtual classroom that truly engages students and fosters knowledge requires more than just a webcam and internet connection. This guide walks you through the essential steps to setting up a successful virtual classroom, empowering you to deliver dynamic and effective lessons to your students, wherever they may be. If you’re new to the concept or looking to deepen your understanding of its foundational aspects, discover our article about what is a virtual classroom, which covers types, benefits, and its importance in 2024.
And dive deeper to unveil the platform that brings this virtual classroom experience to life, transforming education into an immersive and engaging journey.
11 Easy Steps on How to Create a Virtual Classroom
With these 11 steps, you can set up a vibrant learning environment that fosters engagement, interaction, and knowledge mastery for your university students. Get ready to turn your digital space into a dynamic hub of collaboration and discovery!
Step 1: Determine Your Learning Objectives
Before you dive headfirst into the setting up a virtual classroom, take a moment to pause and reflect: What do you want your students to know, understand, and be able to do by the end of their online journey with you? Clearly defined learning objectives are the cornerstones of any effective educational experience, and in a virtual setting, they become even more crucial.
Here’s why:
Focus and direction: Clear objectives provide a roadmap for your entire virtual classroom, guiding platform selection, content creation, and assessment strategies. You’ll know what tools and activities best support your goals and ensure your students are on the right path to success.
Engaged learners: When students understand what they’re aiming to achieve, they become more invested in the learning process. Knowing the “why” behind their tasks fosters motivation and active participation.
Effective assessment: Aligned objectives allow you to design assessments that accurately measure student learning. You can create quizzes, assignments, and projects that directly target the skills and knowledge you want to cultivate.
How to create SMART learning objectives:
Specific: Be precise about what students should learn. Instead of “understand physics,” aim for “apply Newton’s laws of motion to solve real-world problems.”
Measurable: Define how you’ll assess achievement. Can they explain a concept, apply a skill, or demonstrate critical thinking?
Achievable: Set challenging yet attainable goals. Consider your students’ current level and the time constraints of your virtual classroom.
Relevant: Ensure your objectives align with broader course goals and learning outcomes.
Time-bound: Specify the timeframe for achieving each objective. Is it by the end of the module, the semester, or a specific session?
By taking the time to craft SMART learning objectives, you’ll lay a solid foundation for a successful and rewarding virtual classroom experience for both you and your students.
Step 2: Choose the Right Virtual Classroom Platform
Now that your learning objectives are shining bright, it’s time to select the virtual platform that will bring them to life! Think of it as choosing your digital classroom space – you want it to be functional, engaging, and adaptable to your unique needs. As you embark on the path of creating a virtual classroom, pay attention to the following key features:
Essential features to consider:
Ease of use: Both you and your students should navigate the platform intuitively, minimizing technical hurdles.
Security and privacy: Ensure student data is protected with robust security features and privacy protocols.
Interactive tools: Whiteboards, polls, breakout rooms, and other tools foster engagement and collaboration.
Recording capabilities: Capture sessions for asynchronous learning or review purposes.
Price: Choose a platform that fits your budget and offers features you actually need.
Looking for a new and revolutionary L&D solution?
Leave your contact information and a Meetaverse professional will be happy to tell you more about how we can help
Thanks. Your submission was successful.
Step 3: Set Up Your Physical Space
Remember, your virtual classroom isn’t just about the digital world – your physical environment plays a crucial role! It’s your command center, and crafting a dedicated and distraction-free space sets the stage for a smooth and engaging learning experience at home.
Here’s how to optimize your lighting, background, and equipment placement for a seamless and effective virtual classroom setup at home:
Lighting:
If possible, set up near a window for soft, even illumination that flatters your face and surroundings. Avoid harsh overhead lighting that casts shadows.
Install dimmable lamps to adjust brightness and create a warm, inviting atmosphere. Experiment with different color temperatures (warmer for a cozy feel, cooler for a more energetic vibe).
For professional-looking lighting, consider investing in a ring light or softbox. These tools provide even, flattering illumination and reduce shadows.
Don’t sit with a bright light source behind you, as this will make you appear dark and shadowy.
Virtual classroom background:
Opt for a neutral-colored wall or a virtual background that aligns with your course theme. Avoid busy patterns or cluttered areas that distract viewers.
Use them strategically to personalize your classroom environment and enhance your lessons. Choose professional and appropriate backgrounds that don’t draw unnecessary attention.
If you’re serious about virtual backgrounds, invest in a green screen. This allows you to use any image or video as your backdrop without worrying about color clashes.
Equipment placement:
Position your webcam at eye level to create a natural connection with students. Imagine you’re having a conversation, not looking down at them.
Place your microphone close enough to capture your voice clearly without picking up background noise. Test different positions to find the sweet spot.
Avoid placing yourself directly in front of a window or bright light source. This will create glare and make it difficult for students to see you clearly.
Keep cables organized and out of sight to avoid clutter and potential tripping hazards.
If you use a document camera or other equipment, position it strategically so it doesn’t block your view or the camera’s angle.
Silence is golden (and so is clear audio):
Noise cancellation headphones: Invest in a good headset with built-in noise cancellation to minimize external distractions like barking dogs or noisy neighbors. This ensures your voice is crystal clear for your students.
Software solutions: Consider using noise cancellation software like Krisp or Zoom’s AI noise reduction feature. These tools can further filter out background noise, creating a more professional and focused learning environment.
Remember:
Always test your noise cancellation and virtual background settings before your class to ensure they work properly and don’t create any unexpected issues.
While these tools can enhance your virtual classroom, don’t forget the importance of clear communication. Speak clearly and concisely, and be mindful of your body language and facial expressions.
Step 4: Equip Yourself with Technology
Now that you’ve got your physical space in check, it’s time to assemble the technological tools that will bring your virtual classroom to life.
Remember, the key is to find a balance between functionality and your budget. Here’s your guide to essential and optional equipment, as well as software needs, to elevate your online teaching experience:
Essential hardware:
Computer: Choose a reliable computer with enough processing power and memory to handle video conferencing, screen sharing, and other software smoothly.
Webcam: Invest in a good quality webcam that captures clear and well-lit video. Consider resolution, frame rate, and field of view when making your decision.
Microphone: A clear and crisp microphone is essential for ensuring your voice is audible to students. Consider a headset with a built-in microphone for convenience and noise cancellation.
Headset: Not only does a headset offer a clear microphone, but it also helps block out background noise and improve your focus while teaching.
Optional but helpful equipment:
Document camera: This allows you to showcase physical documents, objects, and even experiments to your students in real-time, adding a dynamic element to your lessons.
Green screen: Unlock the full potential of virtual backgrounds with a green screen. This allows you to use any image or video as your backdrop, creating a truly immersive and personalized learning environment.
Tablet: A tablet can be a versatile tool for annotating documents, creating interactive presentations, and engaging with students in various ways.
Software needs:
Video conferencing platform: Choose a platform like Zoom, Google Meet, or Meetaverse that meets your needs in terms of features, security, and budget.
Whiteboard apps: Interactive whiteboards allow you to draw, write, and collaborate with students in real-time, enhancing the learning experience.
Presentation tools: Utilize software like PowerPoint, Google Slides, or online presentation tools to create engaging and visually appealing presentations for your lessons.
Screen recording software: This can be helpful for recording lectures, creating tutorials, or providing students with materials they can revisit later.
Step 5: Design Your Virtual Classroom Environment
Just like a physical classroom, design plays a crucial role in setting the tone and fostering a positive learning experience.
Here’s how to create a welcoming and engaging virtual classroom set up:
Engagement and motivation: A well-designed virtual classroom can capture students’ attention, spark curiosity, and encourage participation.
Brand your teaching: Use visuals and layouts that reflect your teaching style and course theme to create a unique and memorable learning experience.
Accessibility for all: Consider diverse learning needs and design your space to be inclusive for students with different abilities.
Design elements to consider:
Virtual backgrounds: Use them strategically to create a theme that aligns with your course content. Remember, professionalism is key.
Layouts: Experiment with different layouts depending on your activity. Use speaker views, gallery views, or breakout rooms for various purposes.
Interactive elements: Utilize whiteboards, polls, quizzes, and other interactive tools to keep students engaged and actively participating.
Personalize your space: Add a touch of your personality with plants, artwork, or other virtual decorations.
Step 6: Provide Students with Necessary Tools and Access
Your virtual classroom may be humming with potential, but it’s only as effective as your students’ ability to participate.
This step ensures everyone has the necessary tools and access to join the learning adventure:
Identify essentials:
Software and accounts: Clearly list any software they need to download or online accounts they need to create (e.g., video conferencing platform, learning management system).
Hardware considerations: If specific equipment is required (e.g., webcam, microphone), offer recommendations and alternative solutions for those with limitations.
Additional resources: Provide links to tutorials, guides, or other resources that help students navigate the platform and technology.
Clear access instructions:
Platform access: Share detailed instructions on how to access the virtual classroom platform, including login credentials and any additional steps needed.
Resource access: Clearly explain how to access course materials, assignments, and other resources within the platform or through other linked systems.
Communication channels: Establish clear communication channels for students to ask questions, report issues, or seek help with technology.
Troubleshooting support:
Anticipate issues: Identify common technical challenges students might face (e.g., login difficulties, audio/video problems).
Provide solutions: Offer clear troubleshooting steps and FAQs. Consider creating video tutorials or guides for common issues.
Offer support channels: Be available to answer questions and provide assistance during class sessions and through designated support channels (email, online forums).
By ensuring students have the tools and access they need, you’re effectively setting up a virtual classroom that promotes seamless participation and engagement.
Step 7: Send Invitations and Set Expectations
Now that your virtual classroom is ready, it’s time to welcome your students and set the stage for a successful learning experience! This step focuses on virtual classroom organization, clear communication, and setting expectations to create a positive and productive online environment.
Send clear invitations:
Include all necessary details: Date, time, platform name, and any specific session information (e.g., room name, password).
Offer multiple reminders: Send invitations well in advance and follow up with gentle reminders closer to the session date.
Provide joining instructions: Explain how to access the platform, including login credentials or access links. Consider offering alternative methods for those who encounter difficulties.
Use multiple channels: Utilize email, learning management systems, and even social media to ensure everyone receives the invitations.
Establish clear expectations:
Participation: Define what active participation looks like (e.g., using microphones, participating in discussions, completing tasks).
Behavior: Outline acceptable behavior guidelines for respectful and productive online interactions.
Communication: Set expectations for communication protocols (e.g., using chat functions, raising hands virtually).
Technology: Encourage students to test their equipment beforehand and troubleshoot any potential issues.
Step 8: Plan and Prepare Content for Your Virtual Classroom
The heart of any successful classroom, whether virtual or physical, lies in its content. To maximize the impact of your virtual classroom, it’s essential to create a thoughtful and engaging virtual classroom layout.
Here are key considerations to ensure your content aligns seamlessly with the layout:
Clear structure, captivating delivery:
Lesson plan your way: Utilize detailed lesson plans or adopt a more flexible approach depending on your teaching style. Ensure each session has clear objectives, activities, and assessments aligned with your learning goals.
Engage from the start: Hook your students’ attention with opening activities, icebreakers, or thought-provoking questions. Set the stage for an interactive and dynamic learning experience.
Beyond textbooks: embrace multimedia:
Visualize your content: Leverage images, videos, infographics, and even animations to enrich your lessons and cater to diverse learning styles. Visual aids boost understanding and retention.
Let sound speak for you: Include audio clips, podcasts, or even student-created recordings to add another layer of engagement and personalization.
Go beyond lectures: Mix up your delivery with interactive activities like polls, quizzes, live Q&A sessions, or online simulations to keep students actively involved.
Collaboration is key:
Breakout rooms: Utilize breakout rooms for group discussions, collaborative projects, or peer-to-peer learning activities. Encourage teamwork and knowledge sharing.
Collaborative tools: Explore online whiteboards, shared documents, or mind-mapping platforms for real-time collaboration and creative problem-solving. Foster a sense of shared learning and ownership.
Step 9: Testing and Troubleshooting
Technology can be unpredictable, so being prepared is key to ensuring a smooth and successful learning experience.
Testing:
Pre-class testing: Encourage students to test their equipment and platform access before the first session. This helps identify and resolve any potential issues early on.
Test your own setup: Run a test session with a friend or colleague to simulate a real class. Check your audio, video, screen sharing, and other functionalities.
Record yourself: Capture a practice session to review your teaching style, pace, and clarity in the virtual environment. This can be valuable for self-reflection and improvement.
Common technical hiccups and fixes:
Audio issues: Check microphone settings, ensure it’s not muted, and adjust volume levels if needed. Restart your device or try a different microphone.
Video problems: Verify your webcam is connected and enabled. Adjust lighting and camera angle for optimal visibility. Close unnecessary applications that might consume bandwidth.
Platform glitches: Refresh the browser or restart the application. Check for updates and ensure you have a stable internet connection.
Backup plans for unexpected situations:
Power outages: Have a backup plan for continuing the session without internet access, such as pre-recorded lectures or offline activities.
Technical meltdowns: Prepare alternative communication channels like email or phone if the platform crashes. Have a clear plan for rejoining or rescheduling the session.
Student connectivity issues: Be understanding and offer alternative options for students facing internet or equipment problems. Allow them to catch up on missed material later.
By testing thoroughly, troubleshooting proactively, and having backup plans in place, you can navigate technical hurdles with confidence and ensure your virtual classroom remains a space for uninterrupted learning and growth. Additionally, you can create a virtual classroom online that is resilient to unexpected challenges.
Step 10: Manage Students and Engagement
Effective virtual classroom management is crucial for creating a space where learning thrives and all students feel valued and engaged. This step focuses on strategies to establish healthy online interactions, promote active participation, and address potential distractions.
Building the groundwork:
Set clear expectations: Define acceptable online behavior through ground rules that address communication etiquette, respecting others, and responsible technology use. Communicate these expectations clearly and consistently.
Foster inclusivity: Create a welcoming environment where all voices are heard and diverse perspectives are valued. Encourage respectful interactions and celebrate individual contributions.
Establish routines: Implement consistent routines and procedures for joining sessions, mute/unmute protocols, asking questions, and addressing technical issues. This helps maintain order and focus.
Engaging your virtual audience:
Variety is key: Mix up your delivery methods with lectures, discussions, polls, quizzes, collaborative activities, and multimedia elements to keep students actively involved.
Ask open-ended questions: Encourage critical thinking and deeper understanding by posing questions that go beyond factual recall. Promote student-driven discussions and knowledge sharing.
Utilize chat channels: Leverage chat features for real-time feedback, quick questions, and brainstorming sessions. Monitor the chat and respond to messages promptly.
Breakout rooms: Facilitate small group discussions, collaborative projects, and peer-to-peer learning through breakout rooms. This fosters teamwork, communication, and individual accountability.
Addressing distractions and promoting engagement:
Minimize distractions: Set expectations for minimizing background noise, avoiding multitasking, and muting microphones when not speaking.
Interactive activities: Integrate games, polls, and quizzes to keep students engaged and focused. Use platforms with features like hand-raising and live annotations to encourage participation.
Immediate feedback: Provide timely feedback on assignments, discussions, and activities. This reinforces learning and keeps students motivated.
Recognize and reward: Acknowledge students’ contributions, active participation, and positive behavior. This creates a positive learning environment and encourages continued engagement.
Step 11: Analyze Virtual Classroom Analytics for Improvement
By analyzing platform analytics, you gain valuable insights into student engagement, performance, and participation. This data empowers you to identify areas for improvement, refine your teaching strategies, and create an even more effective learning environment.
Why analytics matter:
Unveiling the unseen: Analytics provide a window into student behavior beyond what you observe during sessions. You can see participation patterns, identify areas of confusion, and gauge overall satisfaction.
Data-driven decisions: Make informed choices about your content, activities, and teaching methods based on concrete data, not just intuition.
Personalized learning: Use analytics to tailor your approach to individual student needs and learning styles, fostering a more personalized and effective learning experience.
Key metrics to analyze:
Attendance rates: Track attendance patterns to identify students who might need additional support or motivation.
Activity completion: Analyze completion rates for assignments, quizzes, and discussions to gauge student engagement and understanding.
Communication patterns: Monitor chat activity, forum discussions, and Q&A sessions to understand how students interact and collaborate.
Assessment results: Analyze performance data from quizzes, tests, and projects to identify areas where students excel or struggle.
Interpreting the data:
Look beyond the numbers: Don’t just focus on individual metrics; consider the bigger picture and how they relate to each other.
Compare and contrast: Compare data across different groups of students or activities to identify trends and patterns.
Seek qualitative insights: Supplement quantitative data with feedback surveys and discussions to understand the “why” behind the numbers.
Beyond analytics:
Feedback surveys: Conduct regular surveys to gather student feedback on your teaching, content, and the overall learning environment.
Discussion forums: Encourage open discussions in forums or chat channels to understand student perspectives and concerns.
One-on-one conversations: Schedule individual meetings with students to gain deeper insights into their learning experiences and challenges.
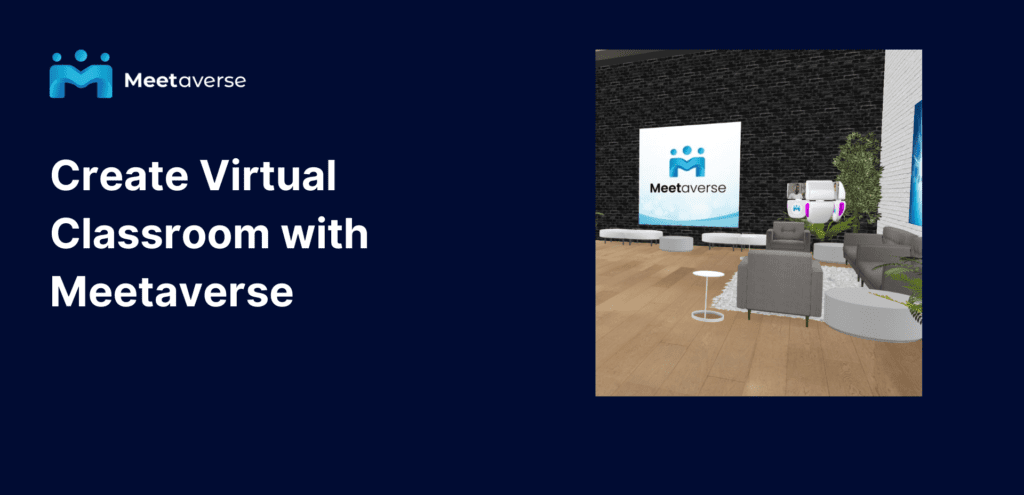
Create Virtual Classroom with Meetaverse
Lucky for you, you’ve stumbled upon this article, unlocking the gateway to an exceptional virtual classroom experience with Meetaverse. This platform goes beyond the ordinary, delivering immersive experiences, fostering interaction, and catering to diverse needs.
Here’s what sets Meetaverse apart:
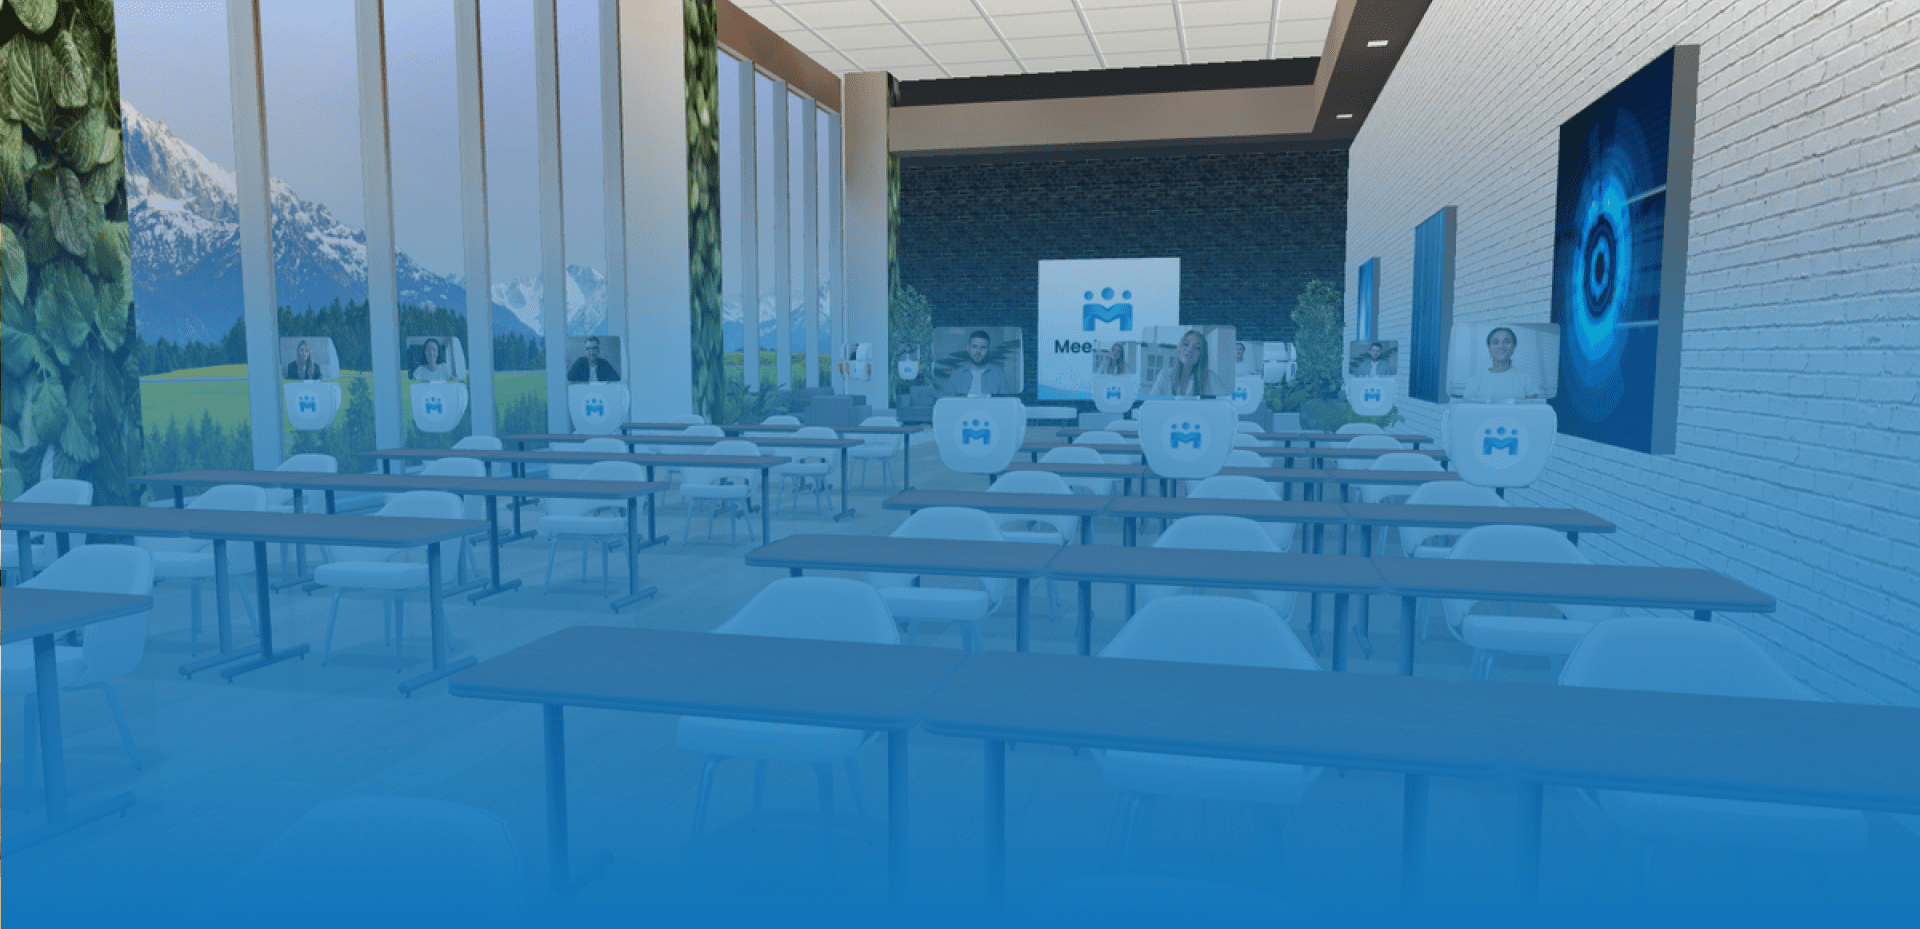
Persistent virtual classrooms: Create and reuse unique classroom spaces, fostering familiarity and community.
Rich interactive features: Whiteboards, polls, breakout rooms, and more keep students engaged and active.
Scalability: Accommodate large classes or multiple sessions seamlessly.
Detailed analytics: Track engagement, performance, and progress to refine your teaching strategies.
Features and technical characteristics of Meetaverse’s virtual classrooms:
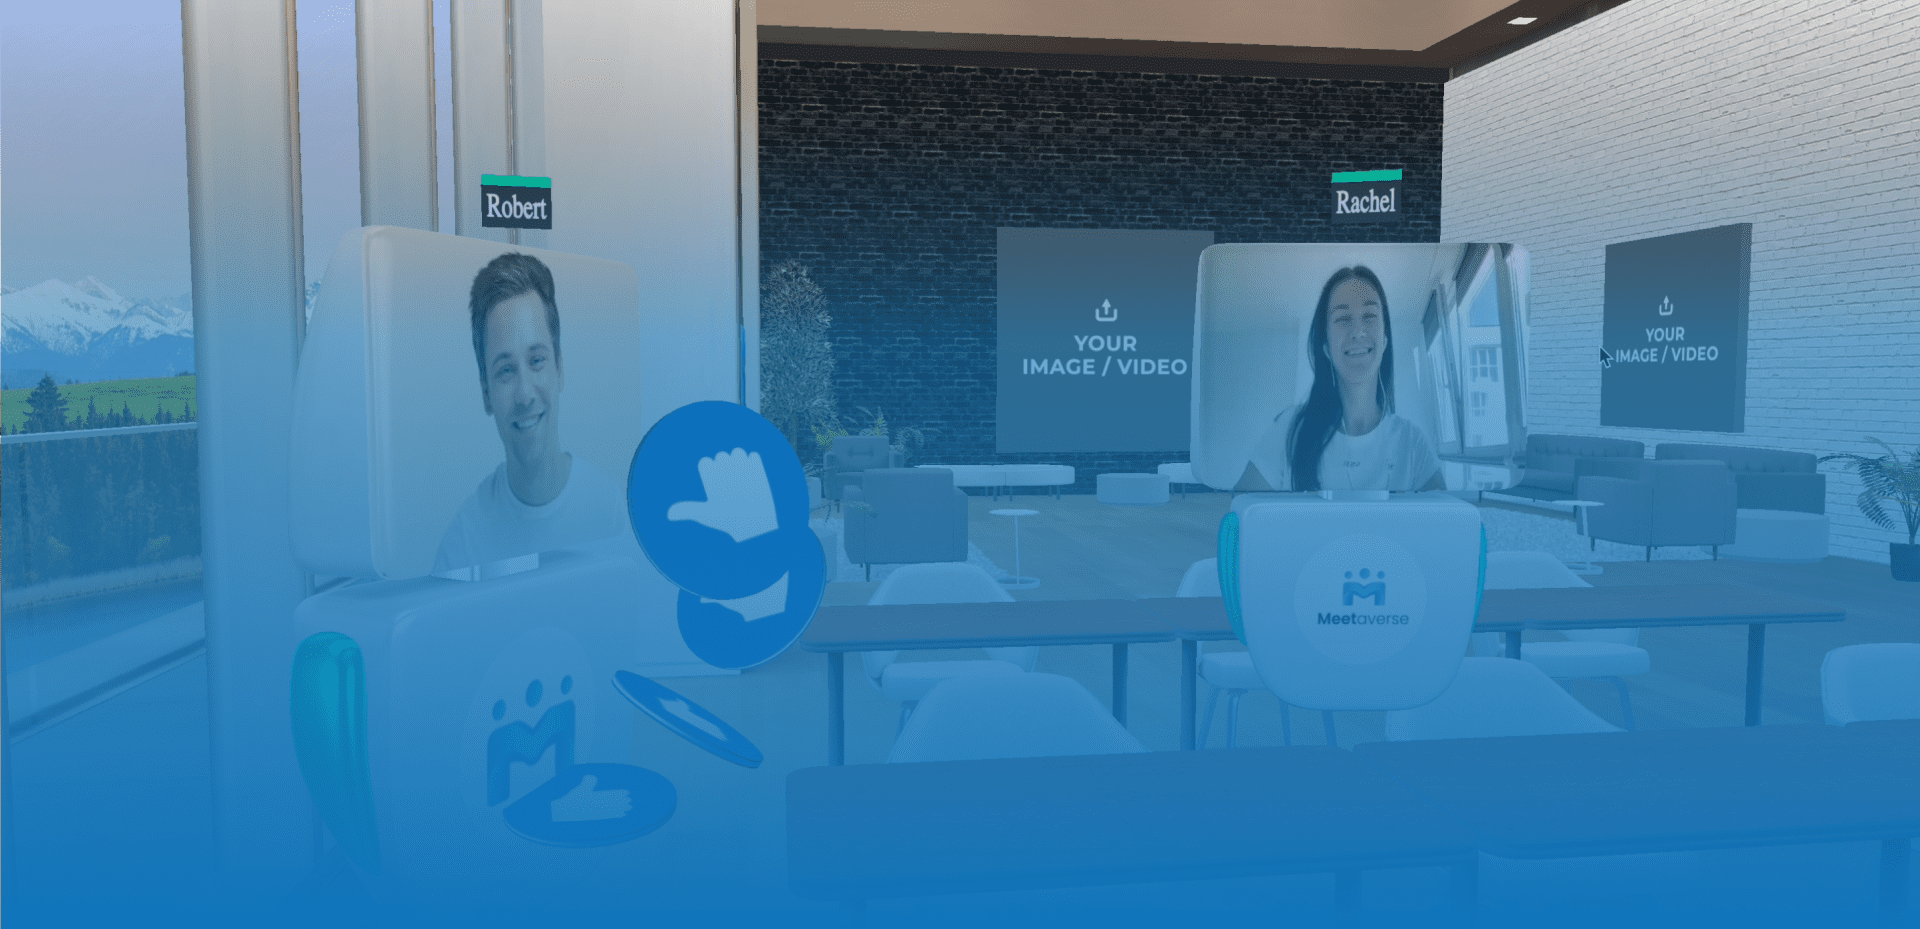
Avatar-based interaction: Students and teachers interact as avatars, fostering a sense of presence and community. Non-verbal communication becomes possible, enriching the learning experience.
Interactive whiteboards and tools: Annotate on virtual whiteboards, share documents, and use 3D models to bring concepts to life. Engage students with polls, quizzes, and other interactive elements.
Spatial audio and realistic environments: Hear conversations and sounds based on their location within the virtual space, creating a more immersive experience.
Easy access and low barrier to entry: Students only need a web browser and internet connection to access the Metaverse classroom. No expensive equipment required!
Book a demo and see how to make a virtual classroom an engaging and unforgettable learning experience for your students.
As we conclude this guide to setting up a virtual classroom, we invite you to embrace the transformative power of online learning. The landscape of education is evolving rapidly, and the virtual classroom opens doors to new possibilities.
Unlock the potential of online learning, where geographical boundaries dissolve, and knowledge becomes accessible to all. The journey to redefine the future of university education in the virtual age starts with you. Let’s continue to innovate, inspire, and create a vibrant hub of knowledge sharing in the digital realm. Together, we shape the future of education for generations to come.
Looking for a new and revolutionary L&D solution?
Leave your contact information and a Meetaverse professional will be happy to tell you more about how we can help
Thanks. Your submission was successful.
4352
FAQ
How to create a virtual classroom?
Creating a virtual classroom involves choosing a platform, designing your space, and gathering necessary tools and resources.
Here’s a simplified overview:
Choose your platform: Popular options include Metaverse, Zoom, Google Meet, and Microsoft Teams. Consider features, cost, and ease of use.
Design your space: Use virtual furniture, decorations, and layouts to create a welcoming and engaging environment.
Gather tools and resources: Choose interactive whiteboards, collaborative documents, polls, and other features to enhance learning.
Set clear expectations: Communicate rules for participation, communication, and technology use.
Plan engaging content: Utilize multimedia, interactive activities, and collaborative tasks to keep students involved.
Test and troubleshoot: Ensure your setup works smoothly before your first session.
Analyze and adapt: Use platform analytics and feedback to improve your classroom over time.
What is the ideal number of students in a virtual classroom?
The optimal number depends on your content, activities, and platform capabilities. Generally, smaller groups (15-20 students) facilitate more interaction and individualized attention. However, larger classes (up to 30-40) can work with careful planning and technology tools.


 Thanks. Your submission was successful.